# All Vagrant configuration is done below. The "2" in Vagrant.configure # configures the configuration version (we support older styles for # backwards compatibility). Please don't change it unless you know what # you're doing. Vagrant.configure("2") do |config|
SCRIPT # The most common configuration options are documented and commented below. # For a complete reference, please see the online documentation at # https://docs.vagrantup.com.
# Every Vagrant development environment requires a box. You can search for # boxes at https://vagrantcloud.com/search. config.vm.box = "centos/7" config.vm.provision "shell", inline: $script
config.vm.define "node3"do |node3| node3.vm.hostname = "node3" node3.vm.network "private_network", ip: "172.17.17.13" end # Disable automatic box update checking. If you disable this, then # boxes will only be checked for updates when the user runs # `vagrant box outdated`. This is not recommended. config.vm.box_check_update = false
# Create a forwarded port mapping which allows access to a specific port # within the machine from a port on the host machine. In the example below, # accessing "localhost:8080" will access port 80 on the guest machine. # NOTE: This will enable public access to the opened port # config.vm.network "forwarded_port", guest: 80, host: 8080
# Create a forwarded port mapping which allows access to a specific port # within the machine from a port on the host machine and only allow access # via 127.0.0.1 to disable public access # config.vm.network "forwarded_port", guest: 80, host: 8080, host_ip: "127.0.0.1"
# Create a private network, which allows host-only access to the machine # using a specific IP. # config.vm.network "private_network", ip: "192.168.33.10"
# Create a public network, which generally matched to bridged network. # Bridged networks make the machine appear as another physical device on # your network. # config.vm.network "public_network"
# Share an additional folder to the guest VM. The first argument is # the path on the host to the actual folder. The second argument is # the path on the guest to mount the folder. And the optional third # argument is a set of non-required options. # config.vm.synced_folder "../data", "/vagrant_data"
# Provider-specific configuration so you can fine-tune various # backing providers for Vagrant. These expose provider-specific options. # Example for VirtualBox: # config.vm.provider "virtualbox"do |vb| # # Display the VirtualBox GUI when booting the machine # vb.gui = true # # # Customize the amount of memory on the VM: vb.memory = "1024" end # # View the documentation for the provider you are using for more # information on available options.
# Enable provisioning with a shell script. Additional provisioners such as # Puppet, Chef, Ansible, Salt, and Docker are also available. Please see the # documentation for more information about their specific syntax and use. # config.vm.provision "shell", inline: <<-SHELL # apt-get update # apt-get install -y apache2 # SHELL end
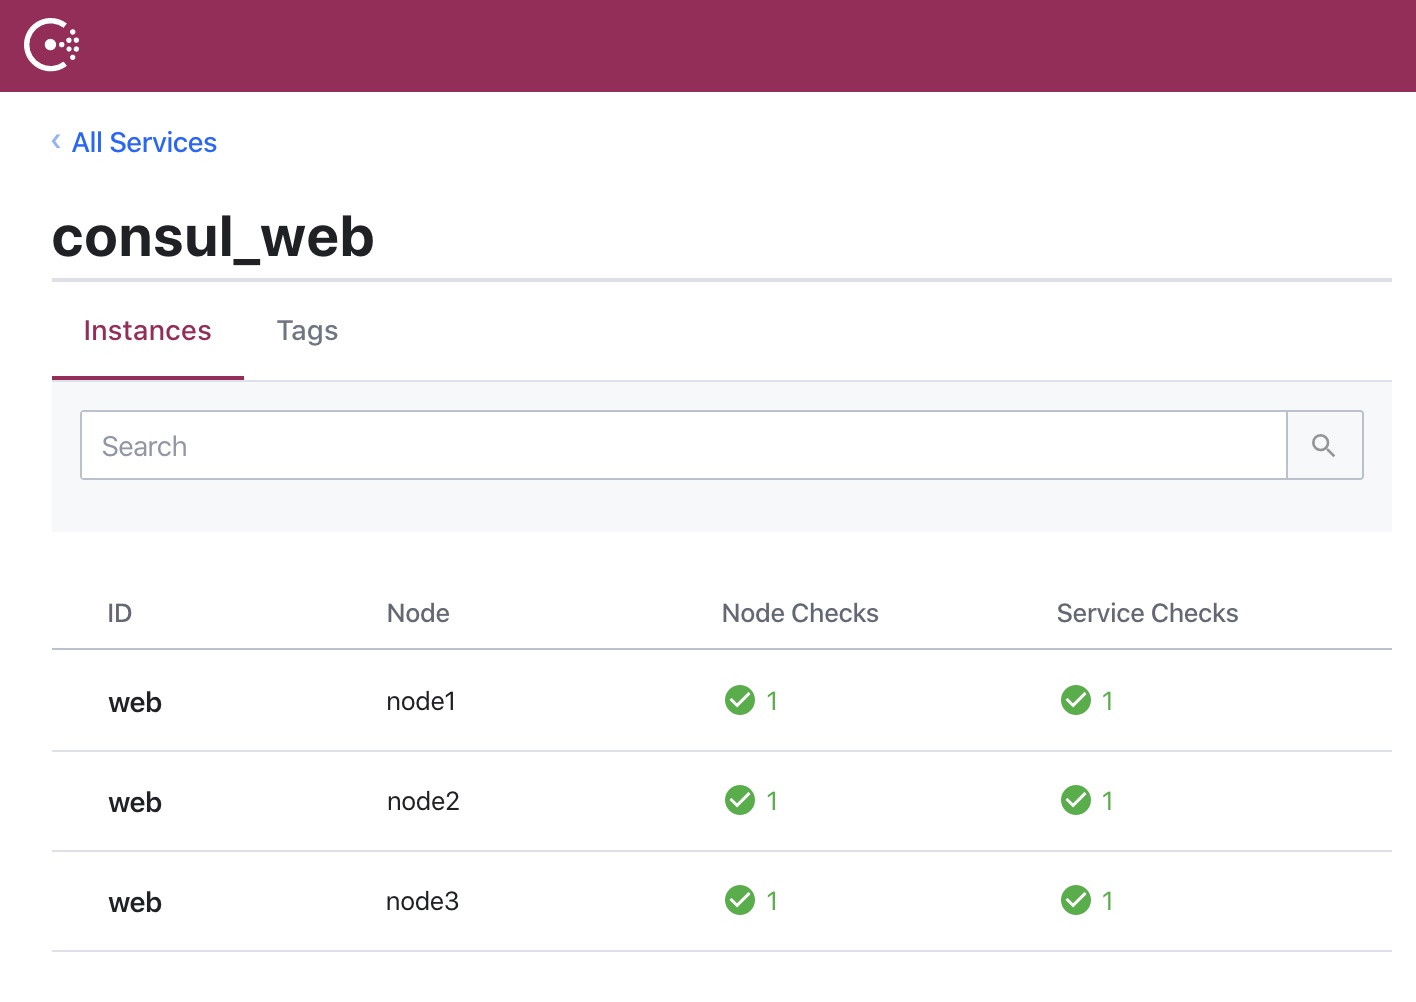
为了节省时间我直接下载好了 consul 的可执行文件放到了 vagrant 配置文件同目录下,vagrant 会把当前目录下的文件都复制进虚拟机的 /vagrant 目录下,还有三个节点的 consul 配置文件。
; <<>> DiG 9.11.4-P2-RedHat-9.11.4-9.P2.el7 <<>> @127.0.0.1 -p 8600 consul_web.service.consul ; (1 server found) ;; global options: +cmd ;; Got answer: ;; ->>HEADER<<- opcode: QUERY, status: NOERROR, id: 11034 ;; flags: qr aa rd; QUERY: 1, ANSWER: 3, AUTHORITY: 0, ADDITIONAL: 4 ;; WARNING: recursion requested but not available
;; OPT PSEUDOSECTION: ; EDNS: version: 0, flags:; udp: 4096 ;; QUESTION SECTION: ;consul_web.service.consul. IN A
;; ANSWER SECTION: consul_web.service.consul. 0 IN A 172.17.17.11 consul_web.service.consul. 0 IN A 172.17.17.13 consul_web.service.consul. 0 IN A 172.17.17.12
;; ADDITIONAL SECTION: consul_web.service.consul. 0 IN TXT "consul-network-segment=" consul_web.service.consul. 0 IN TXT "consul-network-segment=" consul_web.service.consul. 0 IN TXT "consul-network-segment="
;; Query time: 0 msec ;; SERVER: 127.0.0.1#8600(127.0.0.1) ;; WHEN: Thu Feb 0613:10:12 UTC 2020 ;; MSG SIZE rcvd: 210
服务发现 dns
通过 dnsmasq 将节点的 dns 修改为 consul 的,先创建配置文件 /etc/dnsmasq.d/10-consul 内容为
1 2
server=/consul/127.0.0.1#8600 server=223.5.5.5
然后运行 systemctl start dnsmasq 启动 dnsmasq,再把 /etc/resolv.conf dns 服务器地址改成 127.0.0.1。
通过 curl 访问
1 2 3 4 5 6 7 8 9 10 11 12 13 14
[root@node1 ~]# curl http://consul_web.service.consul:32768 -i HTTP/1.1200 OK Date: Thu, 06 Feb 202013:19:43 GMT Content-Length: 178 Content-Type: text/plain; charset=utf-8
# All Vagrant configuration is done below. The "2" in Vagrant.configure # configures the configuration version (we support older styles for # backwards compatibility). Please don't change it unless you know what # you're doing. Vagrant.configure("2") do |config|
SCRIPT # The most common configuration options are documented and commented below. # For a complete reference, please see the online documentation at # https://docs.vagrantup.com.
# Every Vagrant development environment requires a box. You can search for # boxes at https://vagrantcloud.com/search. config.vm.box = "centos/7" config.vm.provision "shell", inline: $script
# Disable automatic box update checking. If you disable this, then # boxes will only be checked for updates when the user runs # `vagrant box outdated`. This is not recommended. config.vm.box_check_update = false
# Create a forwarded port mapping which allows access to a specific port # within the machine from a port on the host machine. In the example below, # accessing "localhost:8080" will access port 80 on the guest machine. # NOTE: This will enable public access to the opened port # config.vm.network "forwarded_port", guest: 80, host: 8080
# Create a forwarded port mapping which allows access to a specific port # within the machine from a port on the host machine and only allow access # via 127.0.0.1 to disable public access # config.vm.network "forwarded_port", guest: 80, host: 8080, host_ip: "127.0.0.1"
# Create a private network, which allows host-only access to the machine # using a specific IP. # config.vm.network "private_network", ip: "192.168.33.10"
# Create a public network, which generally matched to bridged network. # Bridged networks make the machine appear as another physical device on # your network. # config.vm.network "public_network"
# Share an additional folder to the guest VM. The first argument is # the path on the host to the actual folder. The second argument is # the path on the guest to mount the folder. And the optional third # argument is a set of non-required options. # config.vm.synced_folder "../data", "/vagrant_data"
# Provider-specific configuration so you can fine-tune various # backing providers for Vagrant. These expose provider-specific options. # Example for VirtualBox: # config.vm.provider "virtualbox"do |vb| # # Display the VirtualBox GUI when booting the machine # vb.gui = true # # # Customize the amount of memory on the VM: vb.memory = "1024" end # # View the documentation for the provider you are using for more # information on available options.
# Enable provisioning with a shell script. Additional provisioners such as # Puppet, Chef, Ansible, Salt, and Docker are also available. Please see the # documentation for more information about their specific syntax and use. # config.vm.provision "shell", inline: <<-SHELL # apt-get update # apt-get install -y apache2 # SHELL end
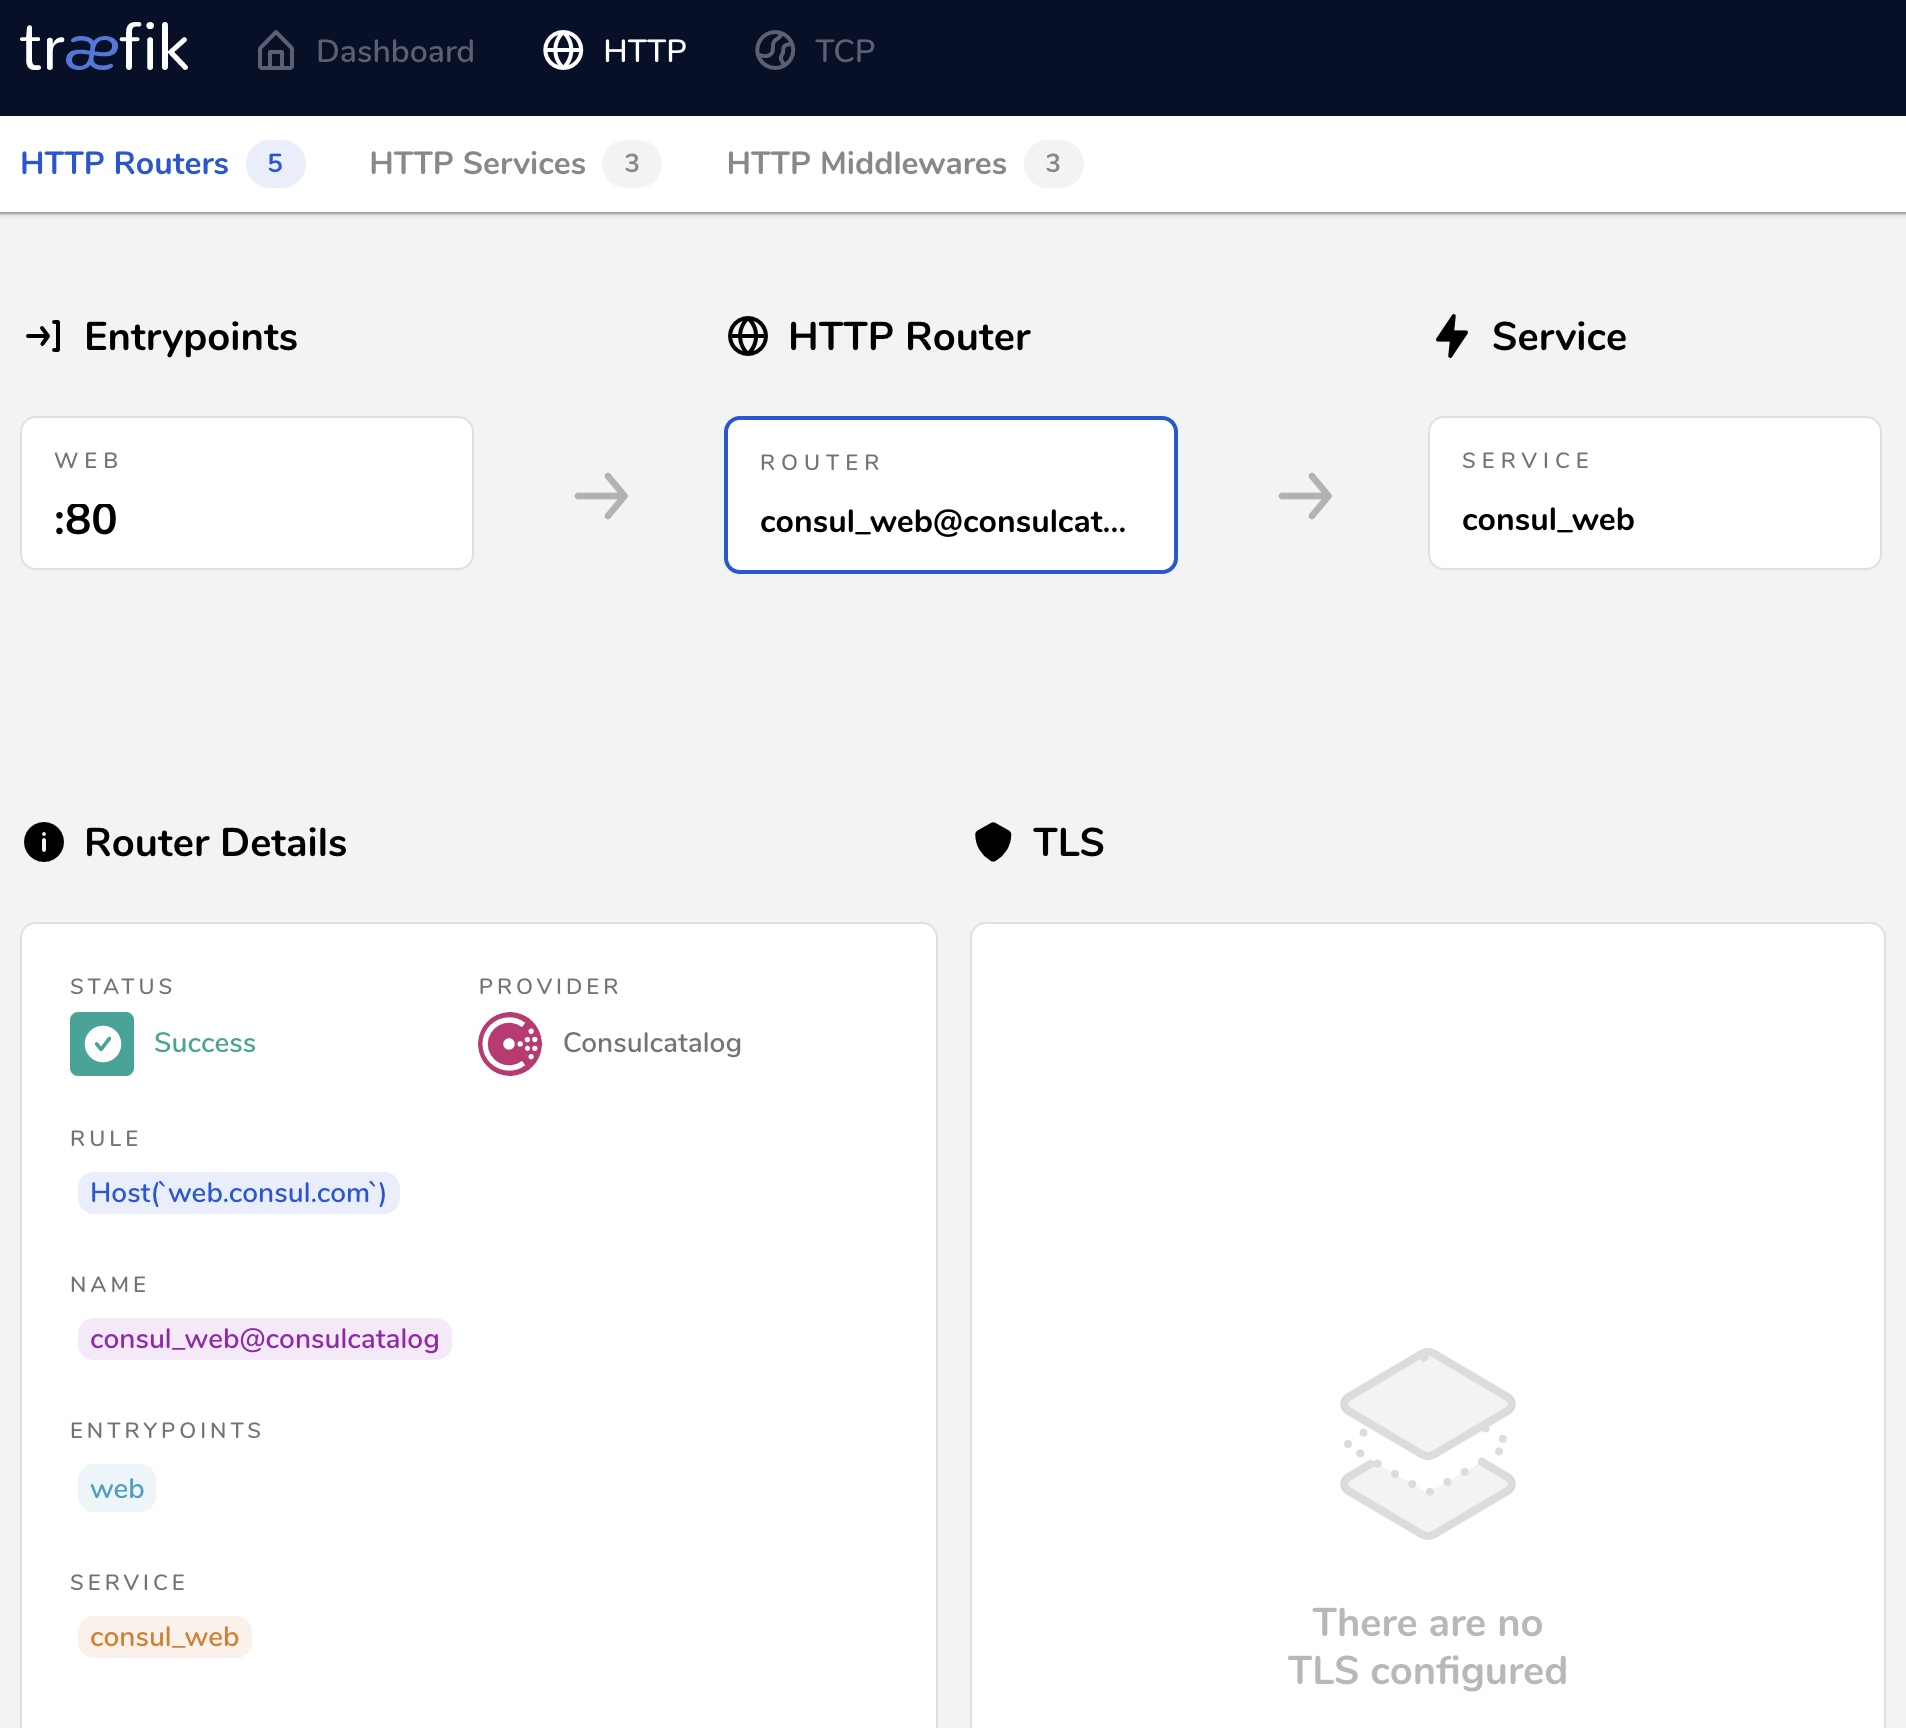
节点为
traefik 172.17.17.21
在 traefik 上运行一个 client 模式的 consul 的 agent,加入 consul 的集群